 病毒分析
点击放大
WiFi-password-窃取器 - Simple Windows and Linux keystroke injection tool
项目说明
<img width="150" align="right" src="./resources/wifi-stealer_logo.png"></img>
WiFi password stealer
![License: GPL v2]()
![]()
![]()
<p align="justify">Have you ever seen a mo a hacker plugs a seemingly ordinary USB drive into a computer and instantly steals data? Today, you'll be building a device that does exactly that.</p>
> :warning: Disclaimer: <p align="justify">All content in this project is intended for security research purposes only.</p>
Table of contents
- Table of contents
- Introduction
- Setup
- Prerequisites
- Rubber Ducky attack
- Requirements - What you'll need
- Keystroke injection tool
- Keystroke injection
- Delays
- Exfiltration
- Windows exploit
- Sending stolen data o
- Linux exploit
- Storing stolen data to USB flash drive
- Bash script
- Quick o of the payload
- Exfiltrated data formatting
- USB Mass Storage Device Problem
- Payload Writer
- Bash Bunny attack
- Limitations/Drawbacks
- References
Introduction
<p align="justify">In the summer of 2022, I set out to build a device capable of extracting data from a target computer. But how exactly does one deploy malware and exfiltrate information? In the following sections, I’ll walk through the essential steps, underlying concepts, and technical nuances in in creating a custom keystroke injection tool. While this project specifically targets WiFi credentials, the payload can easily be modified for more ad or malicious purposes—the only real limits are your creativity and technical expertise.</p>
Setup
<p align="justify">Over time, the project has grown to include a wide of scripts and tools. It was originally created to demonstrate the capabilities of a Rubber Ducky—specifically, a cost-effecti using the Raspberry Pi Pico (RPi Pico). Currently, the two main components of the project are:
<ol>
<li><b>Rubber Ducky attack</b></li>
<li><b>Bash Bunny attack</b>
</li>
</ol>
</p>
Prerequisites
<ul>
<li><p align="justify">Physical access to the unlocked 's computer.</p></li>
<li><p align="justify">The computer has to ha access in order to send the stolen data using <a href=" for exfiltration over a network medium.</li></p>
<li><p align="justify">Knowledge of the 's computer password for the Linux exploit.</p></li>
</ul>
Rubber Ducky attack
<p align="justify">After creating a pico-ducky, you only need to copy the modified payload (adjusted for your SMTP details for the Windows exploit and/or adjusted for the Linux password and a USB drive name) to the RPi Pico.</p>
Requirements - What you'll need
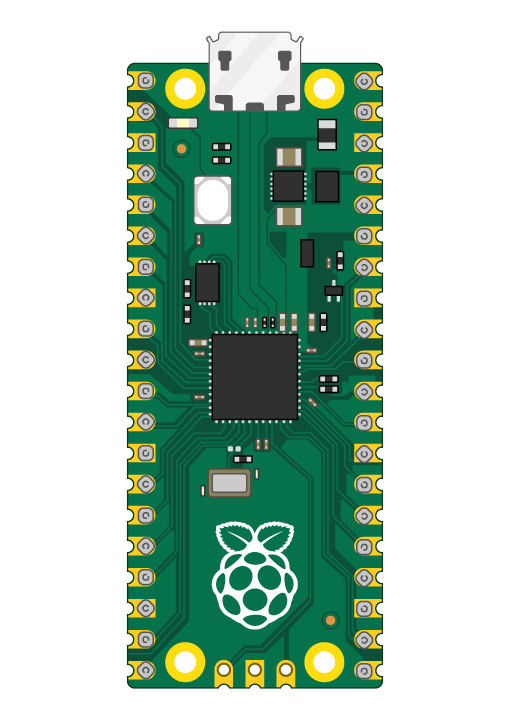
<p align="justify"><img src="./resources/RPi-pico.png?raw=true" width="150" title="RPi pico illustration" align="left" hspace="5" ="5">
<br>
<ul>
<li>RPi Pico</li>
<li>Micro USB to USB Cable</li>
<li>Jumper Wire (optional)</li>
<li>pico-ducky: Transformed RPi Pico into a USB Rubber Ducky</li>
<li>USB flash drive (for the exploit over a physical medium only)</li>
</ul></p><br><br>
> [!NOTE]
> <ul><li><p align="justify">It is possible to build this tool using the Rubber Ducky, but keep in mind that <a href=" Pico</a> costs about $4.00 and the <a href=" Ducky</a> costs $80.00.</p></li>
> <li><p align="justify">However, while pico-ducky is a good and budget-friendly solution, Rubber Ducky does offer things like stealthiness and usage of the latest DuckyScript .</p></li>
> <li><p align="justify">In order to use Ducky Script to write the payload on your RPi Pico, you first need to convert it to a pico-ducky. Follow these <a href=" steps</a> in order to create pico-ducky.</p></li>
> </ul>
Keystroke injection tool
<p align="justify">A keystroke injection tool, once connected to a host machine, executes malicious commands by running code that mimics keystrokes entered by a user. While it looks like a USB drive, it acts like a keyboard that types in a preprogrammed payload. Tools like Rubber Ducky can type over 1,000 words per minute. Once created, anyone with physical access can deploy this payload with ease.</p>
#### Keystroke injection
<p align="justify">The payload uses <code>STRING</code> command to processes injection keystrokes. It accepts one or more alphanumeric/punctuation characters and will type the remainder of the line exactly as-is into the target machine. The <code>ENTER</code>/<code>SPACE</code> will simulate a press of keyboard keys.</p>
#### Delays
<p align="justify">We use <code>DELAY</code> command to temporarily pause execution of the payload. This is useful when a payload needs to wait for an element, such as a Command Line, to load. Delay is useful when used at the very beginning, when a new USB device is connected to a targeted computer. Initially, the computer must complete a set of actions before it can begin accepting input commands. In the case of <a href=" setup time is very short. In most cases, it takes a fraction of a second because the drivers are built-in. However, in some instances, a slower PC may take longer to recognize the pico-ducky. The general advice is to adjust the delay time according to your target.</p>
Exfiltration
<p align="justify">Data exfiltration is the unauthorized transfer of data from a computer/device. Once the data is collected, an ad can package it to avoid detection while sending data over the network using encryption or compression. Two most common ways of exfiltration are:</p>
<ul>
<li>Exfiltration over the network medium.</li>
<ul>
<li><p align="justify">This approach was used for the Windows exploit. The whole payload can be seen <a href="
</ul>
<li>Exfiltration over a physical medium.</li>
<ul>
<li><p align="justify">This approach was used for the Linux exploit. The whole payload can be seen <a href="
</ul>
</ul>
#### Windows exploit
<p align="justify">In order to use the Windows payload (<code>payload1.dd</code>), you don't need to connect any jumper wire between pins.</p>
##### Sending stolen data o
<p align="justify">Once passwords have been exported to the <code>.txt</code> file, payload will send the data to the appointed email using Yahoo SMTP. For more detailed instructions, visit the following <a href=" Also, the payload template needs to be updated with your SMTP information, meaning that you need to update <code>RECEI</code>, <code>SENDER_EMAIL</code>, and your email <code>PASSWORD</code>. In addition, you could also update the body and the subject of the email.</p>
> [!NOTE]
> <ul>
> <li><p align="justify">After sending data over the email, the <code>.txt</code> file is deleted.</p></li>
> <li><p align="justify">You can also use an SMTP from another email provider, but you should be mindful of the SMTP server and port numbers you will write in the payload.</p></li>
> <li><p align="justify">Keep in mind that some networks could be blocking the usage of an unknown SMTP at the firewall.</p></li>
> </ul>
> </p>
#### Linux exploit
<p align="justify">In order to use the Linux payload (<code>payload2.dd</code>) you need to connect a jumper wire between <code>GND</code> and <code>GPIO5</code> in order to comply with the code in <a href=" on your RPi Pico. For more information about how to setup multiple payloads on your RPi Pico, visit this <a href="
<p align="center">
<img
src="./resources/linux-mint_exploit.gif"
alt="Exploit on Linux Mint"
width="100%"
class="center"
/>
<p align="center">
<label><b>Fig. 1</b>: Exploit on Linux</label>
</p>
</p>
##### Storing stolen data to USB flash drive
<p align="justify">Once passwords have been exported from the computer, data will be saved to the designated USB flash drive. In order for this payload to function properly, it needs to be updated with the correct name of your USB dri you will need to replace <code>USBSTICK</code> with the name of your USB drive in two places.</p>
<p align="justify">In addition, you will also need to update the Linux <code>PASSWORD</code> in the payload in three places. As stated above, in order for this exploit to be successful, you will need to know the 's Linux machine password, which makes this attack less plausible.</p>
##### Bash script
<p align="justify">In order to run the <a href=" script you will need to update the script with the correct name of your USB stick after which you can type in the following command in your terminal:</p>
where PASSWORD is your account's password and USBSTICK is the name for your USB device.
##### Quick o of the payload
<p align="justify"><b>NetworkManager</b> is based on the concept of connection profiles, and it uses plugins for reading/writing data. It uses <code>.ini-style</code> keyfile format and stores network configuration profiles. The <b>keyfile</b> is a plugin that supports all the connection types and capabilities that <b>NetworkManager</b> has. The files are located in <i>/etc/NetworkManager/system-connections/</i>. Based on the <b>keyfile</b> format, the payload uses the <code>grep</code> command with regex in order to extract data of interest. For file filtering, a modified positi assertion was used (<code>(?<=keyword)</code>). While the positi assertion will match at a certain position in the string, <a href=" at a position right after the <i>keyword</i> without making that text itself part of the match, the regex <code>(?<=keyword).*</code> will match any text after the <i>keyword</i>. This allows the payload to match the after <b>SSID</b> and <b>psk</b> (<a href=" key</a>) keywords.</p>
<p align="justify">For more information about <b>NetworkManager</b> here is some useful links:</p>
#### Exfiltrated data formatting
<p align="justify">Below is an example of the exfiltrated and formatted data from a 's machine in a <code>.txt</code> file.<p>
USB Mass Storage Device Problem
<p align="justify">One of the ad of Rubber Ducky over RPi Pico is that it doesn't show up as a USB mass storage device once plugged in. Once plugged into the computer, all the machine sees it as a USB keyboard. This isn't a default behavior for the RPi Pico. If you want to prevent your RPi Pico from showing up as a USB mass storage device when plugged in, you need to connect a jumper wire between pin 18 (<code>GND</code>) and pin 20 (<code>GPIO15</code>). For more details visit this <a href="
> :bulb: Tip:
> <ul>
> <li>Upload your payload to RPi Pico before you connect the pins.</li>
> <li>Don't solder the pins because you will probably want to change/update the payload at some point.</li>
> </ul>
Payload Writer
<p align="justify">When creating a functioning payload file, you can use the <a href=" script, or you can manually change the template file. In order to run the script successfully you will need to pass, in addition to the script file name, a name of the OS (<i>windows</i> or <i>linux</i>) and the name of the payload file (e.q. <i><a href="). Below you can find an example how to run the <i>writer</i> script when creating a Windows payload.</p>
Bash Bunny attack
<p align="justify">With a few minor modifications, the pre used scripts can also be adapted to run on the Bash Bunny. The Bash Bunny works by emulating a trusted USB device [1]. For this project, we’ll configure it to emulate a flash storage device using the following command [1, 2]:</p>
<p align="justify">Using the DuckyScript <code>ATTACKMODE</code> command, we can define which type of device the Bash Bunny should emulate [1]. Each attack mode registers with the system using a unique USB ID (VID) and Product ID (PID) [1]. It's also possible to combine multiple attack modes by chaining them together.</p>
<p align="center">
<img
src="./resources/bash_bunny.jpg?raw=true"
alt="Bash Bunny plugged in a PC"
width="100%"
class="center"
/>
<p align="center">
<label><b>Fig. 2</b>: <i>Bash Bunny Mark I</i> plugged in a PC</label>
</p>
</p>
<p align="justify">The Bash Bunny supports the original DuckyScript commands, which is why I was able to reuse the script from the Rubber Ducky section. To use these commands inline, we need to prefix them with the <code>QUACK</code> command [1]. For example, instead of writing <code>WINDOWS r</code>, we write <code>Q WINDOWS r</code>.
To load payloads onto the Bash Bunny, the device must be set to <b>arming mode</b> (switch position 3—the one closest to the USB plug) [1]. Once connected, copy <code>payload.txt</code> and <code>exfil.txt</code> to either <code>payloads\switch1</code>. Payloads must be named <code>payload.txt</code> [1,2], while any supporting files referenced by the payload can be named freely.
For reference, the Bash Bunny mass storage directory structure is as follows [2]:
</p>
<p align="center">
<label><b>Fig. 3</b>: Bash Bunny Mass Storage Directory Structure</label>
</p>
<p align="justify">Once the script has finished executing, the results will be saved in <code>loot\wifi_pass.txt</code>. If the target computer has no saved WiFi passwords, the file will be empty.</p>
> [!NOTE]
> <p align="justify">Since the Bash Bunny attack relies on a PowerShell script (<code>exfil.txt</code>), it can only be used on Windows systems. To use a similar approach on Linux, you'll need to modify the payload and replacing the PowerShell script with the Bash script referenced in the Linux section above. </p>
Limitations/Drawbacks
<ul>
<li><p align="justify"><s>This pico-ducky currently works only on Windows OS.</p></s></li>
<li><p align="justify">This attack requires physical access to an unlocked device in order to be successfully deployed.</p></li>
<li><p align="justify">The Linux exploit is far less likely to be successful, because in order to succeed, you not only need physical access to an unlocked device, you also need to know the admins password for the Linux machine.</p></li>
<li><p align="justify">Machine's firewall or network's firewall may prevent stolen data from being sent over the network medium.</p></li>
<li><p align="justify">Payload delays could be inadequate due to speeds of different computers used to deploy an attack.</p></li>
<li><p align="justify">The pico-ducky device isn't really stealthy, actually it's quite the opposite, it's really bulky especially if you solder the pins.</p></li>
<li><p align="justify">Also, the pico-ducky device is noticeably slower compared to the Rubber Ducky running the same script.</p></li>
<li><p align="justify"><s>If the <code>Caps Lock</code> is ON, some of the payload code will not be executed and the exploit will fail.</p></s></li>
<li><p align="justify">If the computer has a non-English En set, this exploit won't be successful.</p></li>
<li><p align="justify">Currently, pico-ducky doesn't support DuckyScript 3.0, only DuckyScript 1.0 can be used. If you need the 3.0 you will have to use the Rubber Ducky. <b>For this exploit 3.0 isn't needed!</b></p></li>
</ul>
References
1. Bash Bunny by Hak5 Documentation
2. Bash Bunny Basics Wiki
项目信息
开发语言:PowerShell
Star 数:604
技术要点
该项目属于病毒分析方向的开源资源,代码结构清晰,适合安全研究人员学习参考。项目围绕Simple Windows and Linux keystroke injection tool that exfiltrates stored WiFi data (SSID and password).展开,提供了可运行的实现,对理解相关安全机制、工具原理与攻防技术具有较高的研究价值。
从技术实现角度看,此类项目的核心在于对底层原理的深入理解与工程化落地。开发者在研究过程中可以结合官方文档与社区讨论,梳理项目的初始化流程、核心模块职责与数据流转,逐步掌握其中的技术细节与设计思路。
使用与学习建议
1. 下载源码压缩包,解压到本地环境。
2. 根据项目类型准备对应的运行环境与依赖。
3. 按照 README 中的步骤完成配置与部署。
4. 在隔离的测试环境中运行验证,避免影响生产系统。
免责声明
本资源来源于开源社区,仅供安全研究、技术学习与合法授权范围内的攻防演练使用,请勿用于任何非法或侵害他人权益的用途。使用本项目产生的一切后果由使用者自行承担。
| 资源标题 | WiFi-password-窃取器 - Simple Windows and Linux keystroke injection tool |
| 所属分类 | 病毒分析 |
| 发布作者 | admin |
| 发布时间 | 2026-10-05 23:16:50 |
| 下载权限 | 免费下载 |
| 附件数量 | 2 个下载链接 |
| 浏览次数 | 138 |
| 讨论数量 | 0 |
| 主题状态 | 正常讨论中 |