 CTF思路
点击放大
项目说明
<h1><img align="left" src="docs/FiregexLogo.png" width="170" /><br />[Fi]*regex 🔥</h1>
<a href=" alt="GitHub release (latest by date)" src=" <img alt="GitHub" src=" <img alt="GitHub top language" src=" <img alt="Code" src="
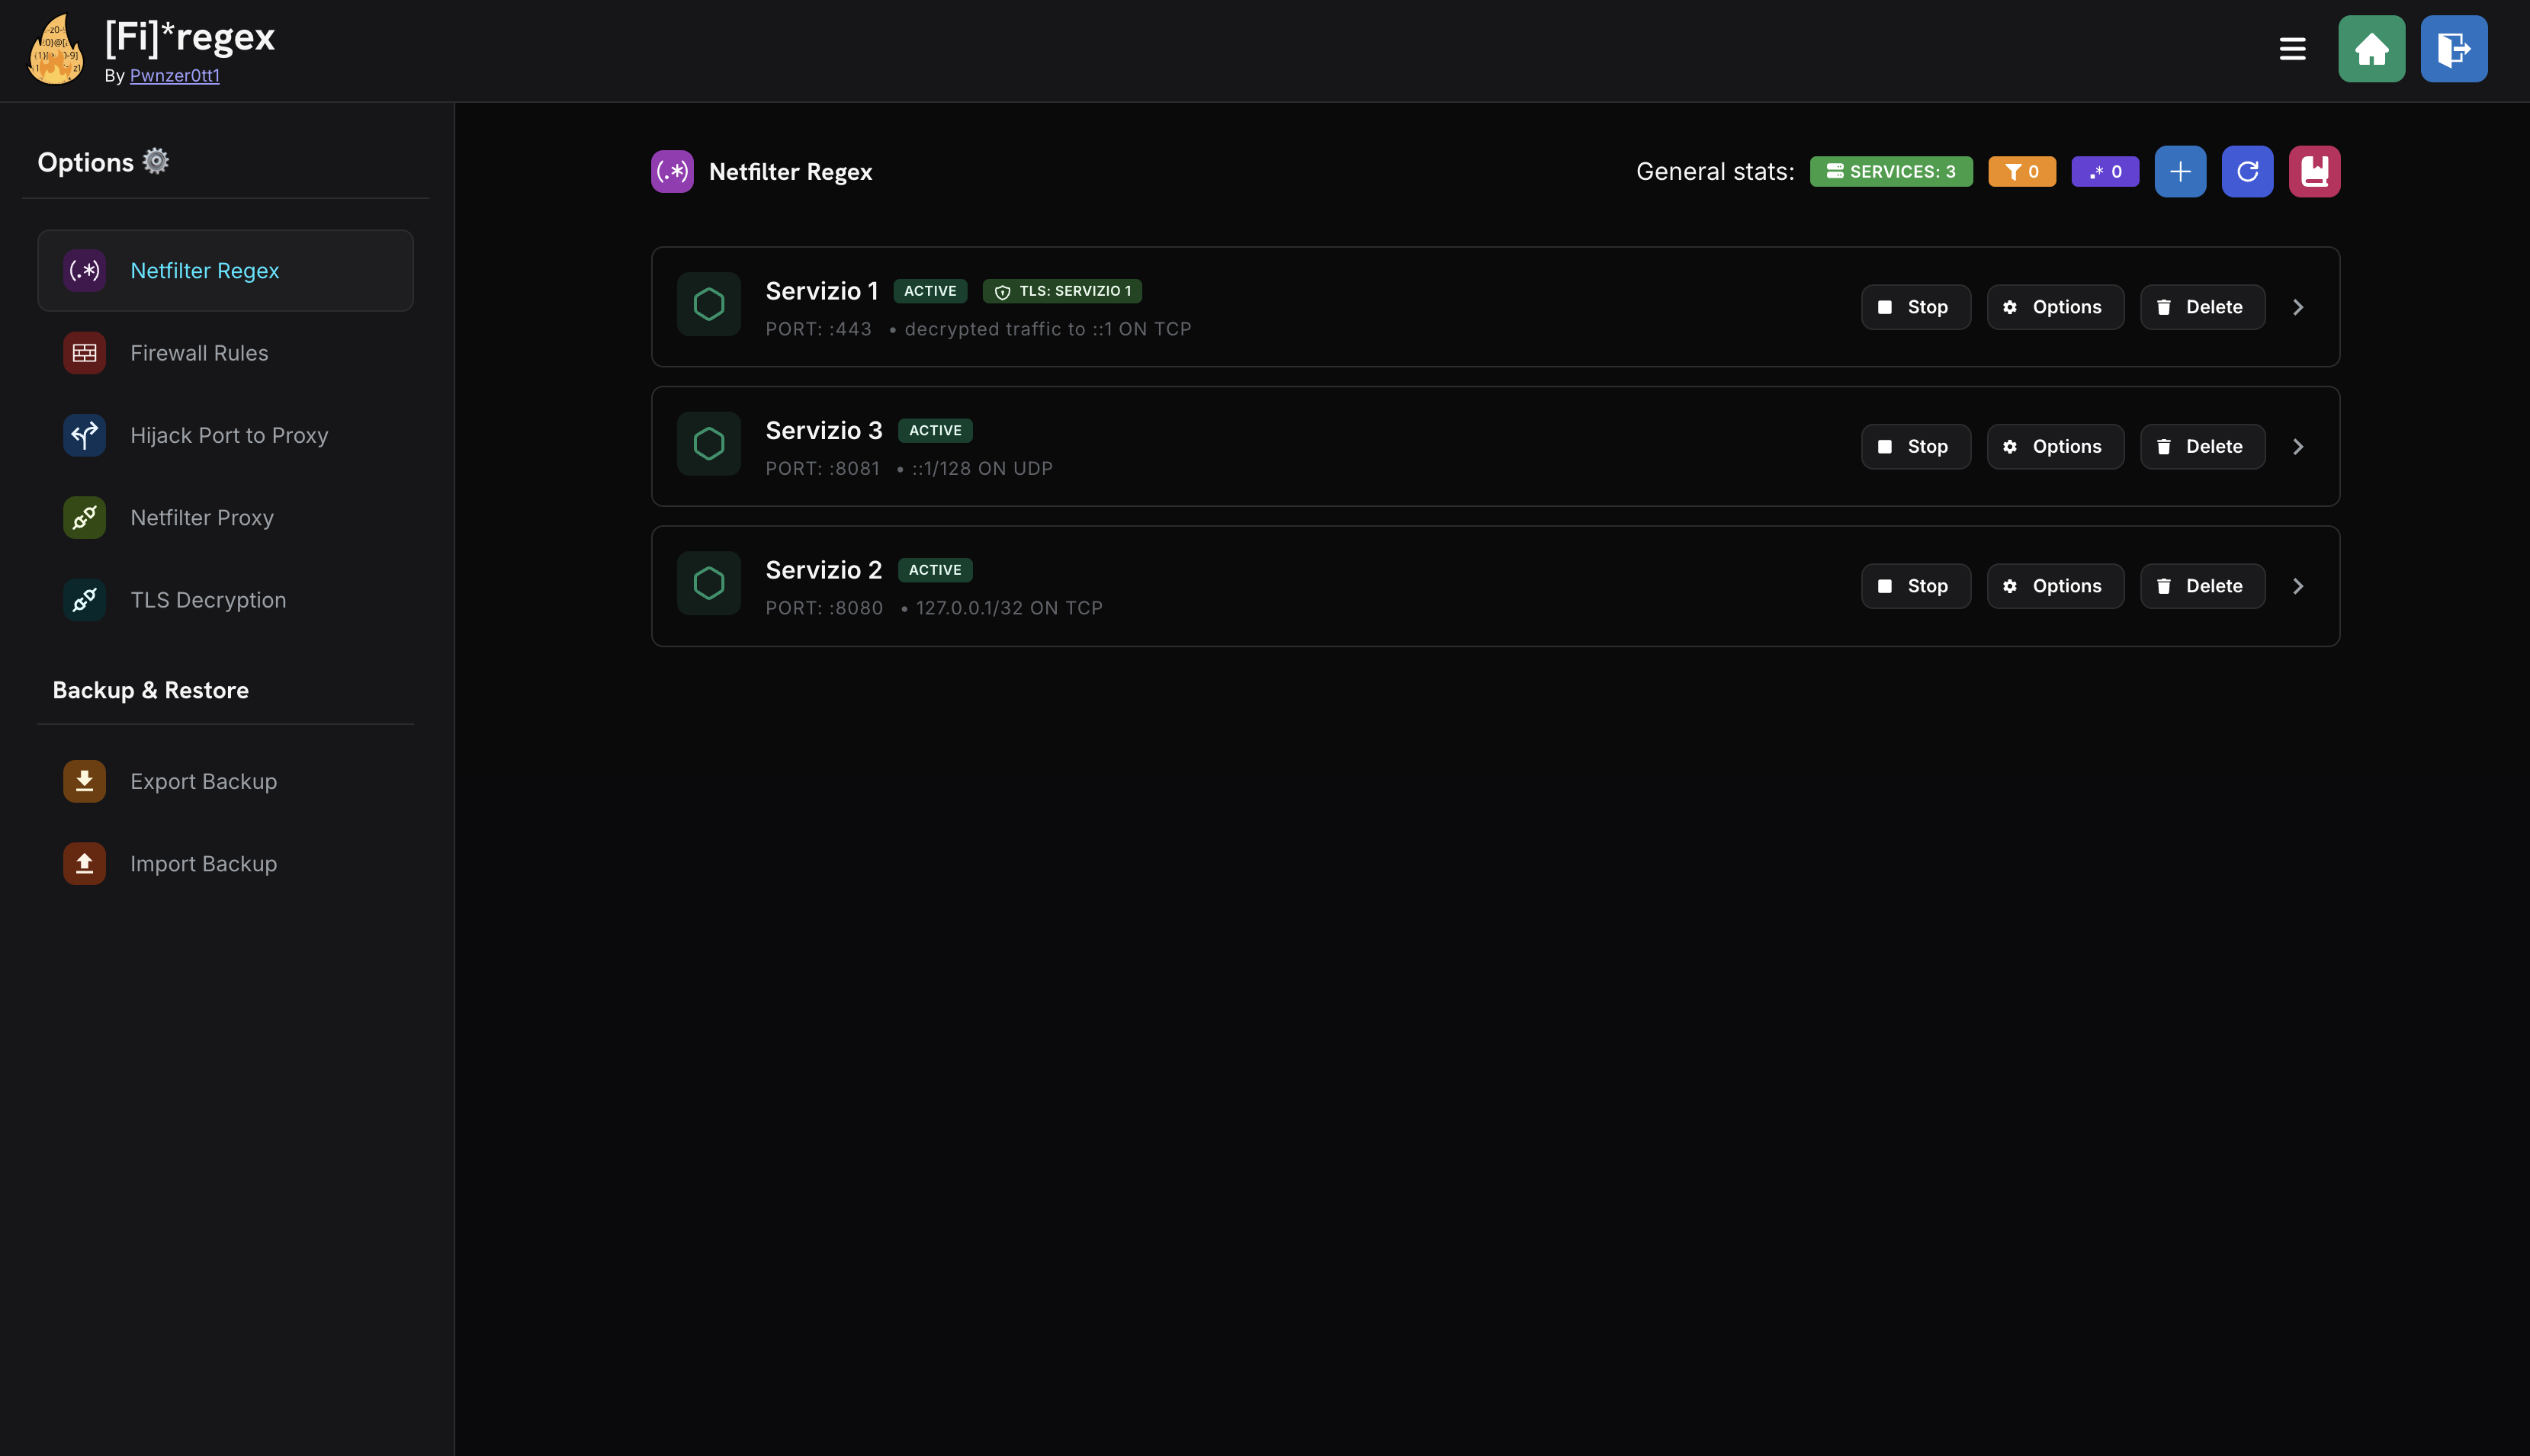
You can see a demo here
<br />
What is Firegex?
Firegex is a firewall that includes different functionalities, created for CTF Attack-Defense competitions that has the aim to limit or totally deny malicious traffic through the use of different kind of filters.
Get started firegex
Docker Mode (Recommended)
What you need is a linux machine and docker ( + docker-compose )
With this command you will download firegex.py, and run it, it will require you the password to use for firegex and start it with docker-compose
Or, you can start in a similar way firegex, cloning this repository and executing this command
Without the --prebuilt flag, it will build the docker image from source, which may take longer.
Standalone Mode
If Docker is not a or you're running it in a rootless en, Firegex can run in standalone mode. The one-command installer above also works for standalone mode and will automatically detect and use standalone mode when Docker is una or in rootless mode.
Standalone mode automatically:
If the server is restarted, docker mode will automatically restart the service, while standalone mode will require you to run the start command again manually.
Cloning the repository run.py will automatically build the docker image of firegex from source, and start it.
Image building of firegex will require more time, so it's recommended to use the just builded and a in the github packages.
This is default behaviour if run.py is not in the firegex source root directory.
By default firegex will start in a multithread configuration using the number of threads a in your system.
The default port of firegex is 4444. At the startup you will choose a password, that is essential for your security.
All the configuration at the startup is customizable in firegex.py or directly in the firegex interface.
Managing the configuration
run.py has a dedicated config subcommand to inspect or change the persisted settings (port, host, socket dir, allowed IPs, password) without needing to stop or rebuild firegex:
This is especially useful if you lost the current password: it's applied directly to the running instance (or the standalone rootfs) without requiring the old one.
!Firegex Network scheme
Functionalities
Firegex can also be restricted to accept connections only from a set of trusted CIDR ranges (--allowed-ips, optionally combined with --proxy-ip-header when running behind a reverse proxy) — see python3 run.py start -h.
Reverse proxy without Firegex authentication
To delegate access control entirely to a reverse proxy, start Firegex with --unsafe-disable-auth:
This disables Firegex's password, JWT, and Socket.IO authentication: every request that reaches Firegex is a full administrator, so bind it to loopback, a Unix socket, or otherwise make sure nothing but the proxy can reach it. Requests forwarded by the proxy, including headers such as X-Forwarded-For, reach Firegex normally. Use --no-unsafe-disable-auth to turn the built-in authentication back on.
A few things worth knowing before using it:
.firegex-conf.json, like --port or --allowed-ips: a later plain python3 run.py start keeps authentication disabled until you pass --no-unsafe-disable-auth. Every start prints a banner while it is active, and python3 run.py config --show reports it.-P, or later python3 run.py config --password). It is unused while authentication is disabled, but it is what you fall back on if you re-enable it. Without one, --no-unsafe-disable-auth brings Firegex up in its initial-setup state, where anyone who can reach it chooses the password./api/login, /api/set-password and /api/change-password answer 403) — otherwise an anonymous caller could plant a credential that keeps working once authentication is back on. python3 run.py config --password still works, since it writes to the database from the host.--allowed-ips is not a substitute for the proxy's access control. Combined with --proxy-ip-header it trusts a client-supplied header, so it only holds up if the proxy o that header and nothing else can reach the port directly.Documentation
Each module above has its own markdown guide under docs/, co how to use it and how it works internally. The same files are rendered directly in the Firegex web interface (via the docs button on each page), so they're always in sync with what you see in the app.
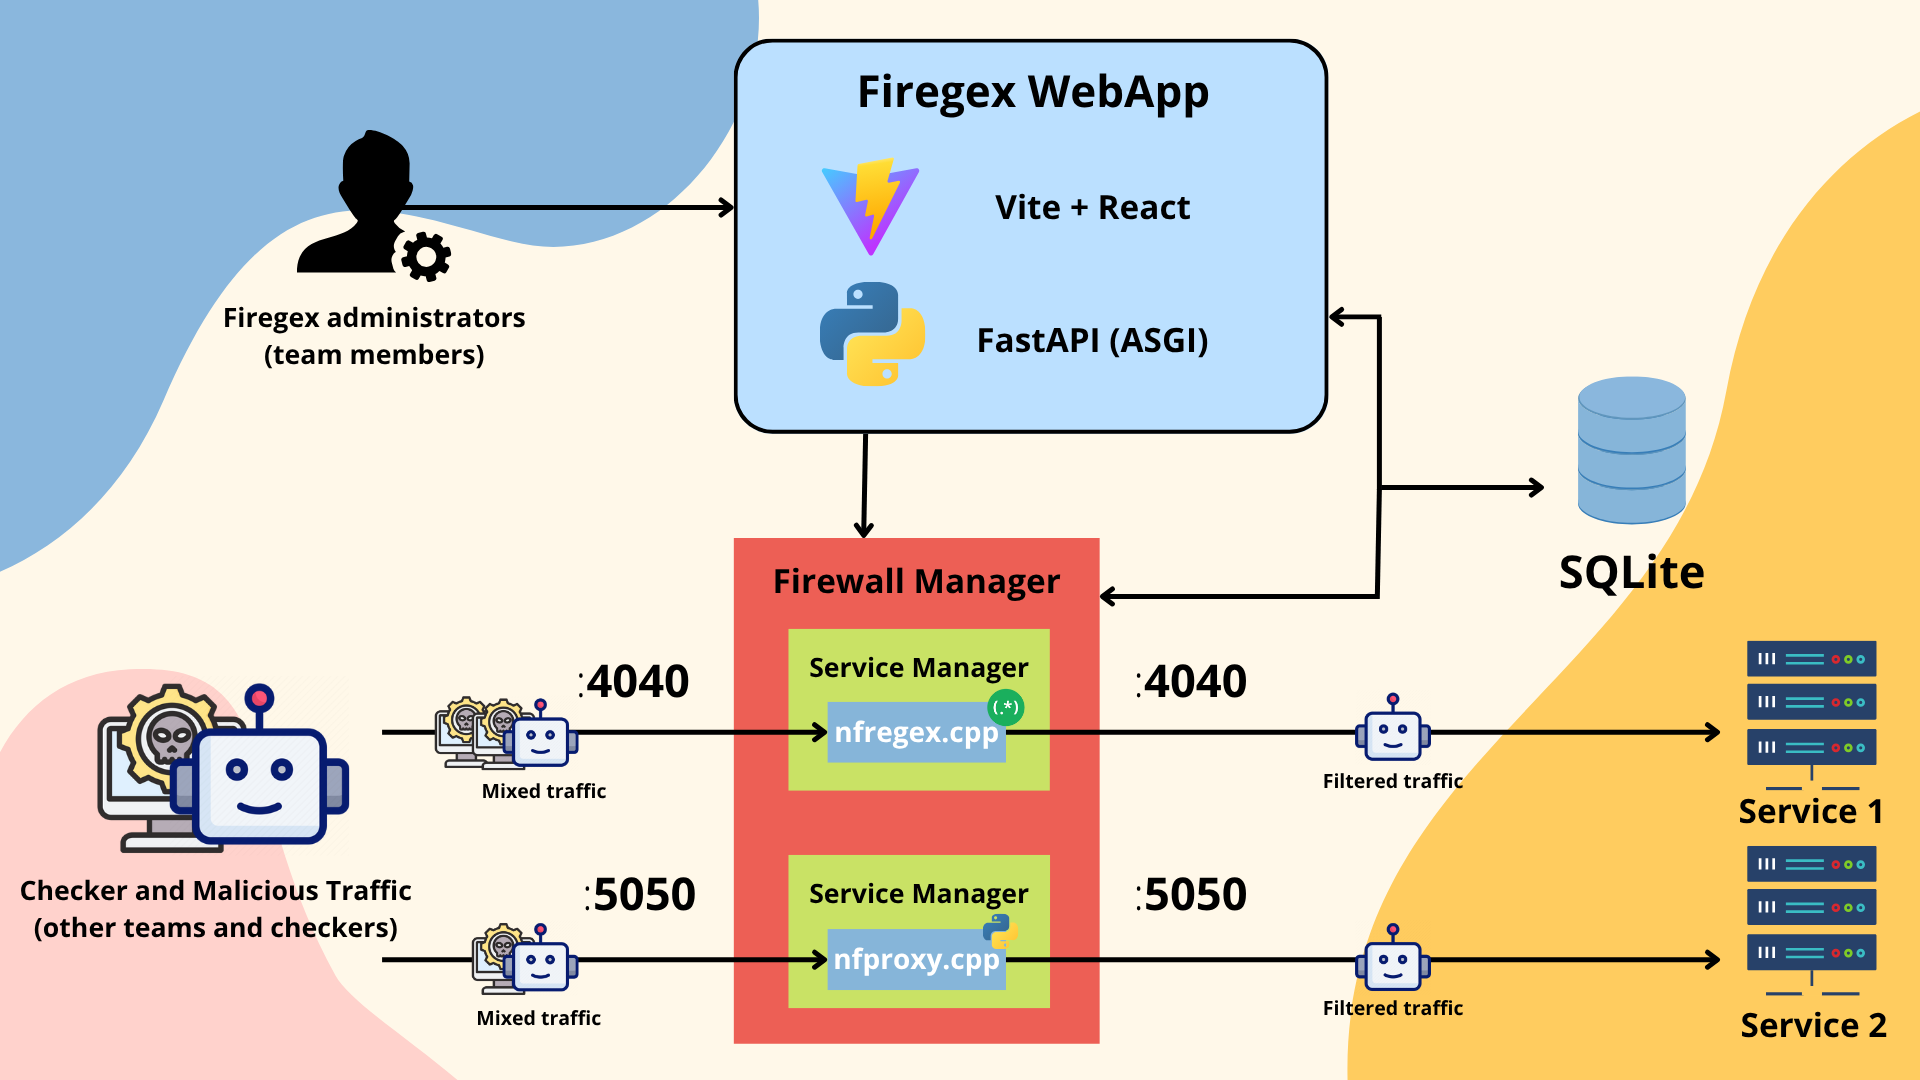
Heres a brief description about the firegex structure:
firegex/fgex pip package)More specific information about how Firegex works, and in particular about the nfproxy module, are a here (in italian only): (PDF in the release attachments)
!Firegex Working Scheme
Main Points of Firegex
#### 1. Efficiency
Firegex should not slow down the traffic on the network. For this the core of the main functionalities of firegex is a c++ binary file.
#### 2. A
Firegex must not become a problem for the SLA points!
This means that firegex is projected to avoid any possibility to have the service down. We know that passing all the traffic through firegex, means also that if it fails, all services go down. It's for this that firegex implements different logics to avoid this. Also, if you add a wrong filter to your services, firegex will always offer you a fast or instant way to reset it to the previous state.
Why "Firegex"?
Initiially the project was based only on regex filters, and also now the main function uses regexes, but firegex have and will have also other filtering tools.
Credits
项目信息
开发语言:Python
Star 数:117
技术要点
该项目属于CTF思路方向的开源资源,代码结构清晰,适合安全研究人员学习参考。项目围绕Firegex, a firewall for Attack-Defense CTFs展开,提供了可运行的实现,对理解相关安全机制、工具原理与攻防技术具有较高的研究价值。
从技术实现角度看,此类项目的核心在于对底层原理的深入理解与工程化落地。开发者在研究过程中可以结合官方文档与社区讨论,梳理项目的初始化流程、核心模块职责与数据流转,逐步掌握其中的技术细节与设计思路。
使用与学习建议
1. 下载源码压缩包,解压到本地环境。
2. 根据项目类型准备对应的运行环境与依赖。
3. 按照 README 中的步骤完成配置与部署。
4. 在隔离的测试环境中运行验证,避免影响生产系统。
免责声明
本资源来源于开源社区,仅供安全研究、技术学习与合法授权范围内的攻防演练使用,请勿用于任何非法或侵害他人权益的用途。使用本项目产生的一切后果由使用者自行承担。
| 资源标题 | firegex - Firegex ,攻击防御CTF的防火墙 |
| 所属分类 | CTF思路 |
| 发布作者 | admin |
| 发布时间 | 2026-10-05 23:53:20 |
| 下载权限 | 免费下载 |
| 附件数量 | 2 个下载链接 |
| 浏览次数 | 486 |
| 讨论数量 | 0 |
| 主题状态 | 正常讨论中 |