 红蓝攻防
点击放大
proxycannon-ng - A private botnet using multiple cloud environments
项目说明
ProxyCannon-NG
>Thank you Wild West Hackin' Fest for your help and support in our community-dri! We' a on-demand proxy tool that le cloud en giving a user the ability to source (all) your traffic from an endless supply of cloud based IP address. Think of it as your own private TOR network for your redteam and pentest engagements. No more defenses throttling and blocking you!
Hackathon sponsored by Sprocket Security and hosted at Wild West Hackin' Fest 2018
<img align="left" width="55%" height="55%" src=" <img align="left" width="40%" height="40%" src="
<br>
<br>
<br>
<br>
<br>
<br>
.
Hackathon Results
In two days, we built the initial release of proxycannon-ng. We're in the process of ironing out final changes and will continue to improve the tool.
Objectives:
~~ Build (scripted)~~
~~Client VPN (Full Tunnel)~~
~~Terraform Node Management (Build, Destroy, Routing)~~
~~AWS Multipath Node Routing (Load Balanced Exit Nodes)~~
Node
Support multiple cloud en (initial release only supports AWS)
Implementation Diagram
!proxycannon-ng
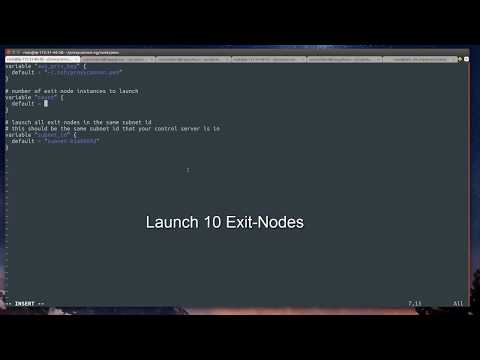
Video Demo
![Video Demo of ProxyCannon-NG]()
Setup
The control-server is a Open that your workstation will connect to. This ser remains up. Exit-nodes are systems connected to the control-server that provides load balancing and multiple source IP addresses. Exit-nodes can scale up and down to suite your needs.
AWS (setup the control-server)
#### 1. Create a separate SSH key pair
1. In the AWS console, go to services (upper left)
2. Select EC2 under the Compute section.
3. Select Key Pairs in the nav on the left.
4. Select Create Key Pair and name it 'proxycannon'.
5. Download and save the key to ~/.ssh/proxycannon.pem
#### 2. Launch the control-ser
1. Launch (1) Ubuntu Ser instance, recommend public AMI ami-0f65671a86f061fcd, and use the "proxycannon" keypair.
2. Login to the control-server and download proxycannon-ng:
3. cd into proxycannon-ng/setup and run sudo ./install.sh
#### 3. Create a new IAM user, set the needed permissions, and copy over your keys. It's quick:
1. In the AWS console, go to services (upper left)
2. Select IAM under the Security, Identity & Compliance section
3. In IAM, select Users in the nav on the left.
4. Select Add user
5. Fill out a User name, and for access type, select programmatic access. Click Next.
6. Select the tab/box that's labeled Attach existing policies directly. Add the following policy: AmazonEC2FullAccess. Click Next, than Create user
7. Copy the access key and secret for the control-server and paste it in ~/.aws/credentials ex:
#### 4. Setup terraform
Perform the following on the control-server:
1. Copy your proxycannon.pem SSH key into ~/.ssh/proxycannon.pem
2. cd into proxycannon-ng/nodes/aws and edit the .tf file updating it with the subnet_id. This is the same subnet_id that your control server is using. You can get this value from the AWS console when the details of the control-ser. Defining this subnet_id makes sure all launched exit-nodes are in the same subnet as your control server.
2. Run terraform init to download the AWS modules. (you only need to do this once)
#### 5. Copy Open to your workstation
Copy the following files from the control-server to the /etc/openvpn directory on your workstation:
Test Open from your workstation by running:
Setup Completed! yay! From now on you'll only need to connect to the VPN to use proxycannon-ng. The next section details how to add and remo (source IPs):
Managing exit-nodes
Scaling of exit-nodes is controlled on the control-ser terraform.
Scale up exit-nodes
To create AWS exit-nodes, do the following:
1. cd into
proxycannon-ng/nodes/aws2. Edit the count value in
.tf to the number of exit-nodes (source IPs) you'd like3. run
terraform apply to launch the instances.Scale down exit-nodes
If you want to stop all exit-nodes run
terraform destroy. OR
Scaling down exit-nodes can be done by reducing the count value in
.tf and running terraform apply again. Terraform will automatically remove X number of exit-node instances. ---
De:
- original proxycannon v1 author
- mad open
- Gets lost deep in iptables
- Streamlining install and a ton of impro
Special thanks to ( on twitter) for de the original proxycannon tool that is our inspirartion.
Known Issues and Troublshooting
See Wiki
项目信息
开发语言:Shell
Star 数:646
技术要点
该项目属于红蓝攻防方向的开源资源,代码结构清晰,适合安全研究人员学习参考。项目围绕A private botnet using multiple cloud environments for pentesters and red teamers. - Built by the community during a hackathon at the WWHF 2018 security conference展开,提供了可运行的实现,对理解相关安全机制、工具原理与攻防技术具有较高的研究价值。
从技术实现角度看,此类项目的核心在于对底层原理的深入理解与工程化落地。开发者在研究过程中可以结合官方文档与社区讨论,梳理项目的初始化流程、核心模块职责与数据流转,逐步掌握其中的技术细节与设计思路。
使用与学习建议
1. 下载源码压缩包,解压到本地环境。
2. 根据项目类型准备对应的运行环境与依赖。
3. 按照 README 中的步骤完成配置与部署。
4. 在隔离的测试环境中运行验证,避免影响生产系统。
免责声明
本资源来源于开源社区,仅供安全研究、技术学习与合法授权范围内的攻防演练使用,请勿用于任何非法或侵害他人权益的用途。使用本项目产生的一切后果由使用者自行承担。
| 资源标题 | proxycannon-ng - A private botnet using multiple cloud environments |
| 所属分类 | 红蓝攻防 |
| 发布作者 | admin |
| 发布时间 | 2026-10-06 00:38:39 |
| 下载权限 | 免费下载 |
| 附件数量 | 2 个下载链接 |
| 浏览次数 | 443 |
| 讨论数量 | 0 |
| 主题状态 | 正常讨论中 |